

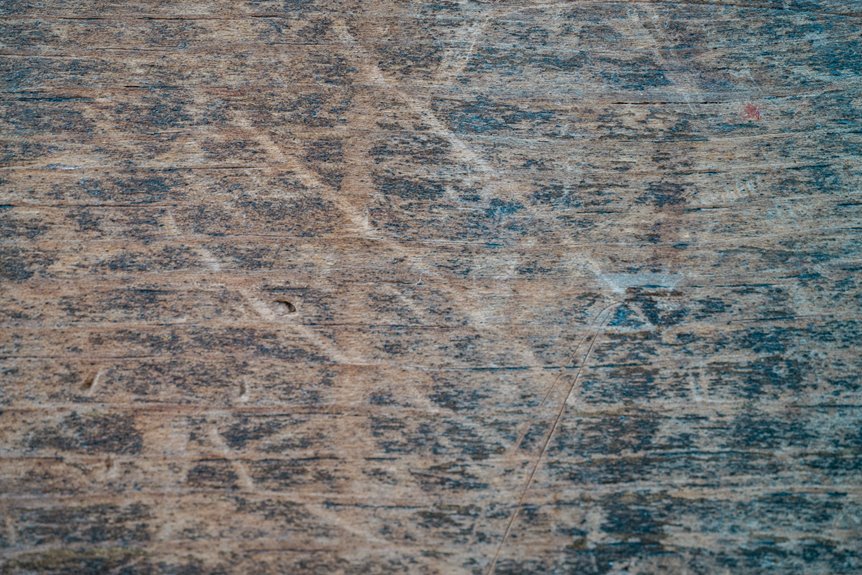
Scratches on wood floors can usually be fixed without replacing boards. Start by deciding whether the mark is a light surface scratch or a deeper gouge, since repair methods differ. Clean the area thoroughly before any repair so products adhere properly. Match repair materials to the existing finish and wood tone for an invisible fix. Finish with a protective coat to blend the repair and keep the floor smooth.
Identify the Scratch Type
Start with the scratch itself, because not every mark on a wood floor needs the same fix. You can feel a light scratch with your fingertip, and it might only affect the finish. A deeper line often catches your nail and could reach the wood. Look at the grain direction, since scratches that run with it can seem softer, while cross-grain marks stand out fast. Also notice finish age, because older coats might look dull or worn around the spot.
In case the damage is tiny, you’re likely seeing surface wear. If it looks white, dark, or rough, you might need a closer look. Whenever you name the scratch right, you give yourself a calm, confident next step.
Clean Wood Floors Before Repairing
A clean floor gives your repair the best chance to blend in, so wipe away dust, grit, and old residue before you touch the scratch.
You’ll feel more confident once the surface is clear, because small particles can make the area look worse and harder to match.
Start with a soft broom or vacuum made for floors, then use a lightly damp microfiber cloth for stubborn film.
For seasonal maintenance, clean a little more often during muddy or dusty months.
Your mop selection matters too, so choose one that leaves barely any moisture behind. Too much water can raise the grain and make the wood unhappy.
Keep your strokes gentle, and focus on the scratched spot plus the nearby boards, so your repair work has a smooth, tidy base to settle into.
Remove Minor Surface Scratches
Initially, clean the scratch area well so dust and grit don’t get trapped in the repair.
Then apply a scratch repair product that matches your floor’s finish, and work it in gently so the mark blends in instead of standing out.
With a little care, you can make those small scratches fade fast and keep your floor looking loved.
Clean The Scratch Area
Before you treat the scratch itself, clean the area around it so you’re not rubbing grit deeper into the wood. Start with a soft microfiber cloth and a little diluted cleaner, then wipe the mark and nearby boards. A quick light inspection helps you spot dust, crumbs, or tiny stones hiding in the grain. You want the floor to feel calm and cared for, like it’s ready to heal.
- Gently sweep loose dirt away
- Wipe with a barely damp cloth
- Dry the spot right after
- Check edges for stubborn specks
- Add a touch of wood polish should the finish look dull
When the surface is clean, you give yourself a better shot at a neat repair, and your floor stays part of the home you love.
Apply Scratch Repair Product
Now that the area is clean, you can start the real repair with a scratch product made for wood floors. Pick a color that matches, then trial it in a concealed spot so you feel sure before you spread it. Use a soft cloth or applicator pad, and work the product into the scratch with light pressure. Let it sit as directed, then buff away any extra so the finish looks natural, not shiny in one lonely patch.
| Step | What you see |
|---|---|
| Pick product | A close color match |
| Apply gently | The scratch starts to fade |
| Buff clean | The floor looks even again |
| Check again | Your room feels put back together |
If the scratch still shows, try eco friendly sealers or ask for professional consultation.
Use a Wood Repair Marker or Crayon
A wood repair marker or crayon can help you hide a scratch fast while you match the color to your floor as closely as possible.
You’ll want to try the shade in a small spot initially, because even a tiny color mismatch can stand out more than the scratch itself.
Then fill the scratch with a light, careful touch so you color only the damaged line and keep the repair neat.
Match The Wood Color
Provided the scratch still stands out, the next step is to blend it into the floor so your repair doesn’t shout for attention. With a wood repair marker or crayon, you can build a close color match that feels natural under your feet.
Start by checking the board in daylight, then compare it with nearby planks so your stain selection feels right, not random. Try a few shades and see which one disappears best:
- warm oak
- deep walnut
- pale pine
- rich cherry
- soft maple
Use light strokes, then wipe away extra color before it settles. You’re not aiming for perfection; you’re aiming to join the room’s rhythm.
Once the tone fits, the scratch fades, and your floor keeps its calm, lived-in look.
Fill Scratches Precisely
Press the color in gently, and you’ll see the scratch start to disappear. Use a wood repair marker or crayon that matches the floor, then work slowly so you stay in control. You’re not fixing the whole room, just helping one small mark blend back in, and that can feel like a win.
For tight scratches, use precision tools like the marker tip or a clean cloth wrapped around your fingertip. In the event the mark is wider, try a light microfiber application to press the color into the groove without smearing it across the finish. Build the color in thin layers, then stop and check your progress in good light. That way, you keep the repair neat, natural, and easy to live with.
Fill Deeper Scratches With Wax
For deeper scratches that catch your fingernail, wax can be a simple, calming fix that helps the damage blend back into the floor. Choose colored wax for a close match, or scented wax should you want the room to feel a little friendlier while you work. Warm the stick gently, then press it into the groove with a clean cloth or your finger.
- See the scratch fill like a tiny path disappearing.
- Smooth the surface until it feels even.
- Wipe away extra wax before it hardens.
- Let the repair rest without rushing.
- Stand back and notice how the floor feels less lonely.
You’re not fixing a flaw alone; you’re giving your floor a small, welcome reset.
Make Repairs Blend In
Now make the repair fade into the rest of the floor, because a good fix should feel quiet, not loud. Choose a filler that matches your wood’s tone, then trial it in a concealed spot before you touch the scratch. Use color theory to compare warm and cool shades, since a tiny shift can stand out later.
Next, wipe away dust so the patch sits clean and even. Then look at the floor from standing height, because lighting effects can change how the repair looks at home.
In case the color still feels off, blend it with a matching stain marker or a thin touch of pigment. Work slowly, and you’ll help the spot join the room like it’s always belonged there, with no awkward spotlight.
Fix Scratches in Polyurethane Floors
Polyurethane floors need a gentle touch, because the finish can make even a small scratch look louder than it really is. You can calm the mark with careful Polyurethane maintenance and the right Finish compatibility check. Before you touch the spot, clean away grit so you don’t drag it farther.
- Look at the scratch under bright light
- Match your repair product to the floor sheen
- Use a soft cloth, not a rough pad
- Try a tiny concealed area initially
- Let each coat dry fully
When you choose a product, make sure it fits your floor’s topcoat, not just the wood below. That keeps your space looking cared for, and it helps you feel right at home.
Slow, steady care usually wins here, and your floor will thank you with a smoother shine.
Try Home Remedies for Small Scratches
Small scratches can often fade with a few gentle home remedies, so you don’t always need a big repair right away.
Start by cleaning the spot with a soft cloth so you can see the mark clearly. Then try a small dab of natural oils, like olive oil, to help blend the scratch into the wood. Rub it in with a cotton cloth, and wipe away the extra.
If the scratch still shows, you can lightly apply a paste made with baking soda and water.
For a fresh scent, some people mix a little lemon balm tea and use it on the cloth, not the floor.
These simple fixes can help you feel more at home, and they’re easy to try one at a time.
Sand and Refinish Deep Scratches
Deep scratches need a firmer fix, so sanding and refinishing can help bring the wood back to life. You can tackle the damaged spot with a power sander, but keep it moving so you don’t dig deeper. Then do finish removal until the bare wood shows cleanly. This step might feel serious, yet you’re not alone, and many homeowners face the same worn patch.
- Image dust gathering in a soft ring
- Envision a smooth, pale strip emerging
- Visualize the old sheen fading away
- Imagine new stain sinking in evenly
- See the floor glowing like it belongs again
After sanding, wipe the area well and apply matching stain and finish in thin coats. Let each layer dry fully before the next. That careful rhythm helps your floor look steady, warm, and whole.
Prevent Scratches on Wood Floors
You can stop many scratches before they start through placing floor protectors under chairs, tables, and heavy furniture.
You should also clean grit and dirt often, since tiny particles can act like sandpaper every time you walk across the room.
A few simple habits now can save you from more floor repairs later, and that’s a relief your hardwood will appreciate.
Use Floor Protectors
Floor protectors can save your wood floors from a lot of everyday wear, and they’re one of the easiest fixes to put in place. Whenever you add them under chairs, tables, and sofas, you help your room feel cared for and welcoming.
Use furniture sliders on heavy pieces so you can move them without dragging. Choose rubber feet for legs that stay in place, because they cushion each step and cut down on scuffs.
- A chair gliding softly across the floor
- A sofa resting on neat rubber feet
- A dining table that stays steady
- Sliders tucked under a bookcase
- A cozy room where every piece belongs
You’ll notice fewer marks right away, and your floors will keep that smooth, warm look your home deserves.
Clean Grit Regularly
Grit can sneak onto your wood floors fast, and it often acts like tiny sandpaper under your feet. You can stop that damage with daily sweeping, especially near doors, hallways, and pet paths. Use a soft broom or vacuum made for hard floors, so you lift dust without scratching the finish.
Then, once or twice a week, follow with microfiber mopping to catch the fine particles sweeping leaves behind. Should you’ve got kids, friends, or a busy home, that extra pass helps your floors stay part of the comfort you all enjoy. Also, keep small mats at entrances and shake them out often. Whenever you stay ahead of grit, you protect the wood and keep every room feeling warm, clean, and cared for.
Choose the Right Wood Floor Products
Pick the right wood floor products, and the scratch repair process gets a lot easier right away. You want cleaners, fillers, and touch-up kits that match your floor’s finish and wood species. Whenever you check product compatibility initially, you avoid cloudy patches and sticky spots that can make you feel like you’ve joined the wrong club. Follow simple maintenance schedules so you grab the same trusted items each time.
- A gentle pH-neutral cleaner
- A color-matched wood filler
- A soft microfiber pad
- A finish-safe touch-up marker
- A small applicator brush
These choices help you blend repairs with the rest of the floor. Then you can work with confidence, appreciating your space still looks cared for and welcoming under your feet.
Keep Wood Floors Looking Smooth Longer
To keep your wood floors looking smooth longer, start with the small habits that protect the finish every day. You can place felt pads under chairs, wipe spills fast, and sweep grit before it turns into tiny cuts.
Then add regular polishing to refresh the shine and help the surface resist light wear. Your home also needs steady humidity control, because dry air can make boards shrink and stress the finish, while damp air can cause swelling.
Frequently Asked Questions
Can Pet Nails Cause Permanent Wood Floor Scratches?
Yes, they can. You will reduce damage with pet proofing strategies and nail trimming routines, so your floors stay welcoming and your home feels cared for. Should scratches happen, you are not alone, and help is available.
How Long Do Scratch Repairs Usually Last?
Most scratch repairs last months to years, depending on repair durability and how often you perform maintenance. Your floors will look great longer if you clean gently, protect high traffic areas, and stay proactive.
Should I Hire a Professional for Deep Scratches?
Yes, you should if the scratch runs deep, spans planks, or you want a flawless result. You will get a professional assessment, protect warranty considerations, and feel confident your floor looks its best.
Can Scratches Affect the Floor’s Resale Value?
Yes. Scratches can lower your floor’s resale value. You will see market perception dip, cosmetic damage become more noticeable, and buyers may take greater notice. You can protect your home’s appeal, build trust, and keep your space looking well cared for.
Are Laminate Scratch Fixes Different From Hardwood Repairs?
Yes, you’ll fix laminate differently from hardwood: you’ll focus on the wear layer, while hardwood needs sanding and refinishing. You’ll also need color matching so your repair blends in and feels like it belongs.



