

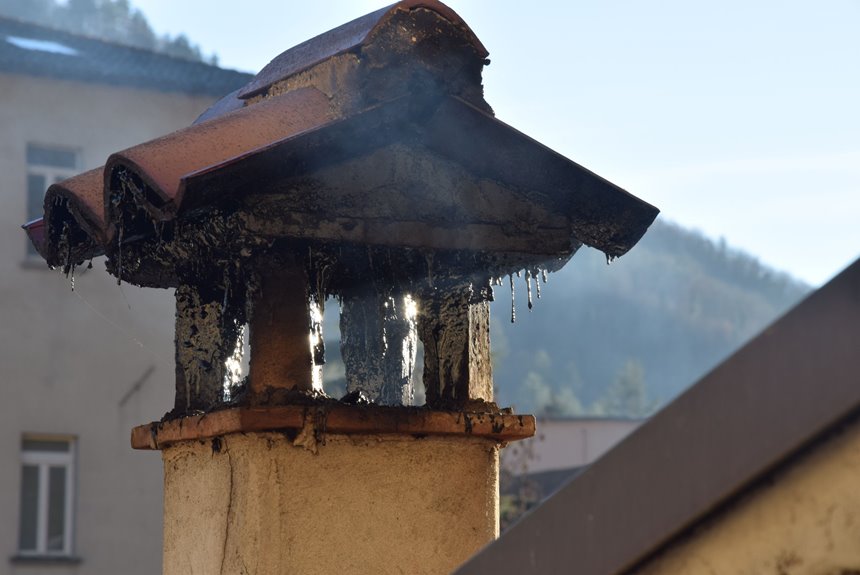
Cleaning a chimney starts with proper gear and a clear workspace to keep dirt and sparks under control. Inspect the flue, damper, and firebox with a bright light to spot soot build-up, animal nests, and structural damage. Work methodically in sections, using a brush designed for your chimney type to dislodge creosote and debris. Catch falling soot with drop cloths and a debris bag to protect your home. Stop and call a professional if you find significant cracks, heavy creosote layers, or signs of animal infestation.
What You Need Before Cleaning a Chimney
Before you start cleaning a chimney, gather the right gear so the job feels safer and a lot less stressful. You’ll want seasonal supplies that fit the weather, like gloves, a mask, a drop cloth, and sturdy eye protection.
Next, check your inspection checklist so you can spot cracks, loose bricks, or heavy soot before you begin. Also, clear the space around the fireplace and move nearby décor, because a tidy area helps you work with confidence.
Should you live with family or roommates, let them know what you’re doing so everyone stays out of the way. Finally, keep a flashlight close, since dark flue openings can hide trouble. With these basics ready, you’ll feel more prepared and part of a safer, calmer home routine.
Gather Chimney Cleaning Tools
Before you start, gather the essential chimney cleaning tools so you’re not scrambling halfway through the job. You’ll want brushes, extension rods, a sturdy vacuum, and a drop cloth to keep soot under control.
Don’t forget protective safety gear like gloves, goggles, and a dust mask, because a little prep now can save you a messy, itchy surprise later.
Essential Cleaning Tools
Gathering the right chimney cleaning tools can make the job feel a lot less intimidating, and it helps you work with more confidence from the start. You’ll want chimney brushes that match your flue size, plus extension rods and a sturdy drop cloth. A shop vacuum helps catch loose soot, while a flashlight lets you check dark corners. Should your chimney have flue liners, choose tools that fit gently so you don’t scratch the surface. Use the table below to keep your setup simple:
| Tool | Why it helps | Best use |
|---|---|---|
| Chimney brush | Loosens buildup | Scrub the flue |
| Extension rods | Reach higher spots | Keep strokes steady |
| Shop vacuum | Collects debris | Clean the firebox |
When you’re organized, you feel like part of a crew that knows the job well.
Protective Safety Gear
Protective safety gear matters just as much as the brushes and rods, because chimney cleaning can kick up fine soot, sharp debris, and a surprising amount of dust.
You’re not just protecting yourself, you’re joining the crew of careful homeowners who do the job right.
- Wear fire resistant clothing so stray sparks or hot residue don’t ruin your day.
- Put on gloves to keep grime, splinters, and sharp edges off your hands.
- Use safety goggles so ash and flakes stay out of your eyes.
- Wear a chemical respirator whenever soot or old creosote smells strong.
With the right gear, you can move through the task with more confidence and less stress.
That small layer of protection helps you stay steady, comfortable, and ready for every dirty little surprise.
Prep the Fireplace and Work Area
Clear the space around the fireplace so you can work without bumping into tools, dust, or stray logs. Move furniture, rugs, and décor a few feet away, so you’ve got room to kneel and reach with ease. Then seal vents and close nearby doors to help keep soot from drifting into the rest of your home.
You can lay down a drop cloth or old sheet to catch loose debris, which makes cleanup feel a lot less overwhelming. Next, gather your brush, vacuum, and trash bag in one spot so you’re not hunting for them later. Keep a bucket of water nearby too, just in case. Once your space feels calm and ready, you’ll be set to clean with more confidence and less stress.
Inspect the Chimney Before You Start
With the room now set, take a close look at the chimney before you brush or vacuum anything. This quick check helps you stay safe and feel confident, like you’ve got the job under control.
During your annual inspection, look for cracks, loose bricks, rusted parts, and dark, shiny buildup. Also, watch for wildlife intrusion, such as nests or dropped twigs, because small surprises can block airflow.
- Shine a light up the flue.
- Check the damper for smooth movement.
- Notice any strong odors or damp spots.
- Look for signs of smoke leaks around the opening.
If something seems off, pause and get help before you go further. That way, you protect your home and keep your cleanup plan on track.
Clean the Chimney Step by Step
Before you start scrubbing, put on your safety gear so you can work with confidence and keep soot off your skin and eyes.
Then use your brush to scrub the flue interior, moving from top to bottom so you loosen buildup without making a bigger mess.
Take your time with each section, and you’ll make the job feel more manageable and a lot less intimidating.
Gather Safety Gear
Pulling together the right safety gear is the smartest initial move you can make, because chimney work can get dirty, dusty, and a little risky fast. You’re not just getting ready; you’re joining the clean-up crew with confidence. Make sure you have:
- Safety glasses to shield your eyes
- A dust mask for proper ventilation
- Work gloves for a better grip
- Non-slip shoes and a sturdy ladder for ladder stability
Before you start, check each item and replace anything worn out. This keeps you steady, calm, and less likely to get startled by soot in the wrong place.
Whenever your gear fits well, you can move with more ease and feel like you belong in the job, not like you’re fighting it.
Scrub Flue Interior
Now it’s time to scrub the flue interior, and this is where the real soot fight begins.
You’ll feel more confident once you work from top to bottom with your flue brush.
Push it up, pull it down, and keep steady pressure so you loosen the creosote stuck on the walls.
Should the buildup feel stubborn, don’t rush; just make smaller passes and let the brush do the work.
You can also use chemical cleaners provided your chimney manual allows them, but follow the label closely and wear your gear.
As you clean, check for cracks, damp spots, or loose debris.
That way, you’re not just scrubbing, you’re protecting the whole system.
Take your time, stay calm, and you’ll handle this like part of the crew.
Remove Creosote Safely
Creosote can look harmless at initially, but this sticky black buildup can catch fire fast should you leave it alone. You can tackle it safely whenever you use calm, steady steps and keep your focus on the work.
- Wear gloves, goggles, and a dust mask before you start.
- Brush loose creosote into a bag, so it doesn’t drift back onto you.
- Provided buildup feels stubborn, use approved chemical solvents carefully and follow the label exactly.
- Once the layer is heavy or glazed, call for professional removal and let trained help handle it.
Stay patient and work in small sections. That way, you keep control and feel like part of a crew that knows how to protect the home.
Check for Damage and Blockages
Before you move on to deeper cleaning, check the chimney for damage and blockages, because both can turn a simple task into a risky one. You’re protecting your home and the people in it. Use a flashlight to look for cracked flue tiles, loose bricks, or gaps in the mortar. Whenever you inspect mortar, notice any crumbling spots that let smoke escape. Then check the throat, smoke shelf, and cap for soot, nests, or fallen debris. | Area | What to Look For |
| — | — |
|---|---|
| Flue | Cracks, chips, loose buildup |
| Mortar | Crumbling, gaps, wear |
| Top and opening | Nests, twigs, debris |
If you spot signs of wildlife removal, clear the passage before you brush. A clear chimney helps your fire draw well, and it keeps your home feeling safe and cared for.
When to Call a Chimney Sweep
You should call a chimney sweep whenever you find damage, stubborn soot, or a blockage that you can’t clear safely on your own. Should your fire starts to smoke back into the room, or you notice a smoke odor after the flames die down, don’t wait. A pro can spot concealed problems and keep your home feeling safe and warm.
For seasonal inspections, let the experts handle the hard-to-reach spots.
- Creosote keeps building up.
- Animal nests block airflow.
- Cracks can spread fast.
- Damaged liners need repair.
Once you bring in help promptly, you join many homeowners who protect their hearth without stress. That peace of mind matters, especially whenever your family gathers around the fire.
Frequently Asked Questions
How Often Should a Chimney Be Professionally Inspected?
You should schedule an annual inspection, and more often if you use your fireplace heavily. A professional can check creosote levels, spot damage, and keep you confident your home’s chimney system stays safe.
Can I Clean a Chimney From the Top Down?
Yes, you can clean from the top down, and 70% of DIY chimney accidents involve falls. You will need roof access, fall protection, and a steady hand. You are safer whenever you follow the crew’s methods.
What Type of Chimney Brush Fits My Flue?
Choose a brush that matches your flue’s shape and size: a nylon brush for clay or metal liners, or twisted wire for heavy creosote. You will fit best once the brush scrubs snugly without forcing.
Is Chimney Cleaning Safe During Winter?
Yes, you can clean your chimney in winter provided you have proper ventilation and watch for condensation buildup. You will protect your hearth, and you are not alone; many homeowners safely handle it with care.
How Do I Know if My Chimney Cap Is Damaged?
You’ll spot damage if you see rust, dents, loose mesh, or cracks. Watch for squirrel entry or cap corrosion, since both mean your cap is not sealing properly and your home is not protected.



