

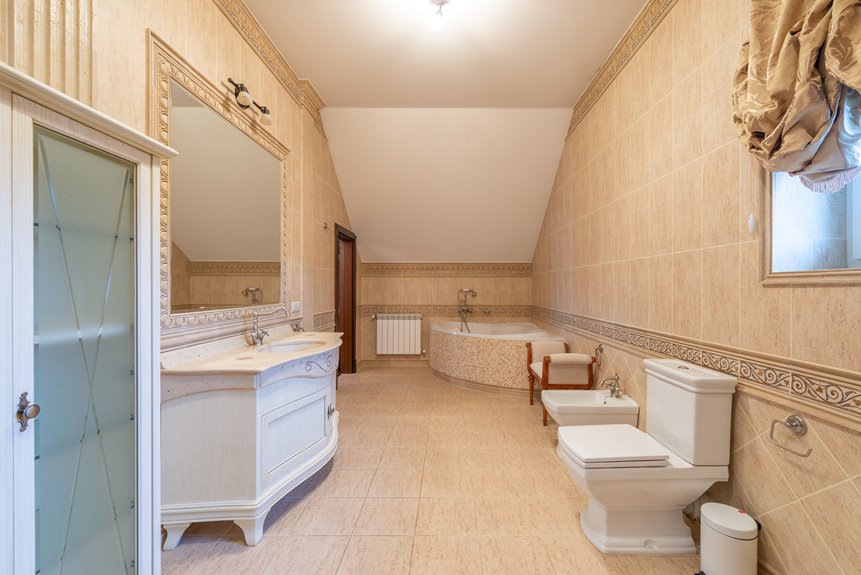
Mold on a bathroom ceiling can be removed safely with the right steps and precautions. Start by stopping moisture sources like leaks or poor ventilation so mold does not return. Wear gloves, goggles, and a mask to protect skin and lungs during cleaning. Use a suitable cleaner or diluted bleach solution on non-porous surfaces and replace any damaged materials that hold mold. Addressing ventilation and fixing leaks provides the lasting solution after the visible mold is gone.
What Causes Mold on Bathroom Ceilings?
Most often, mold on a bathroom ceiling starts with too much moisture hanging in the air.
Whenever you shower, steam rises and lingers, and bathroom humidity can stay high long after the water turns off. In case warm, wet air hits a cooler surface, tiny drops form on the ceiling. Over time, that dampness gives mold a place to grow.
Poor airflow makes the problem worse, especially provided a fan is weak or you rarely open a window.
Ceiling insulation can also matter, because a cold ceiling invites more condensation.
You’re not alone provided this happens in your home; lots of people deal with the same annoying spots.
Small leaks above the ceiling can add even more moisture, so the surface stays wet and mold keeps coming back.
What You Need to Clean Bathroom Ceiling Mold
Before you start scrubbing, gather the right supplies so you’re not stopping halfway through the job. You’ll need a cleaner made for mold, a spray bottle, warm water, microfiber cloths, a soft sponge, and a bucket.
For tougher spots, keep a plastic scraper nearby, but use it gently so you protect material durability. A step stool helps you reach the ceiling safely and keeps the job steady.
Also, open a window or run the fan, because better air quality makes the space feel fresher while you work. Should the mold look light, simple soap and water could be enough.
Should it be stubborn, a stronger cleaner can save time. Having everything ready keeps you calm, focused, and part of the solution, not the mess.
Protect Yourself Before Cleaning
Now that you’ve got your cleaning supplies ready, take a minute to protect yourself, because mold can be irritating even while the spot looks small.
Before you begin, wear gloves so your skin stays away from the grime and cleaning solution. Add eye protection too, since tiny bits can float up whenever you move around the ceiling. Should you be sensitive to dust or smells, slip on a mask as well, so you can breathe easier and feel calmer.
Open a window or turn on the fan to help fresh air move through the room. Then keep kids and pets out while you work, because you deserve space to handle this safely. A few simple steps now can help you stay comfortable and confident.
How to Remove Mold From a Bathroom Ceiling
Start by checking the mold spot so you know what you’re handling with.
Mix warm water and a little dish soap, then lightly dampen a sponge or soft cloth. Wipe the mold from the bathroom ceiling in small sections, and don’t soak the surface. In case the patch sits near ceiling insulation, keep moisture low so you don’t trap more dampness above you. After each pass, rinse the cloth and keep going with fresh solution.
Once the mold lifts, dry the area with a clean towel and let air move through the room. Use fans or open a window provided you can.
Then watch the space for return growth. Humidity sensors can help you spot moisture spikes beforehand, so your bathroom feels cleaner and safer for everyone.
How to Remove Stubborn Mold Stains
Whenever those dark marks stay behind, pre-treat the stain with a cleaner made for mold so you could loosen it before you scrub.
Then use a soft brush to lift the discoloration without damaging the ceiling, and in case the stain still shows through, repeat the process until it fades.
You might need a few passes for deep stains, but steady care usually brings the ceiling back to a cleaner, calmer look.
Pre-Treat Stubborn Stains
Should the mold stain still cling to your bathroom ceiling after cleaning, give it a little extra help before you scrub again. Mix a mild paste with natural enzymes, or use a cleaner made for lingering stains. Let it sit so it can decompose what’s left behind.
In case you prefer another route, try a gentle UV treatment from a handheld tool made for home use, following the label closely. These steps can loosen the stain without making the spot worse.
You’re not alone should the mark look stubborn; bathroom ceilings can hang onto ghostly patches. Once the pre-treatment works, the surface usually looks lighter and more ready for the next cleanup step. Keep the room airy, and let the product do its job.
Scrub With Soft Brush
Gently scrubbing the stain can make a big difference, and you don’t need to press hard to get results. Use a soft brush so you can protect the paint while still loosening the mold marks.
Your gentle scrubbing should move in small circles, then switch to light strokes where the stain looks darker. Should the spot feel rough, pause and let the cleaner do more of the work.
Bristle choice matters here, so pick bristles that bend a little instead of scraping the ceiling. That way, you keep control and avoid extra damage.
As you work, wipe away loosened grime with a damp cloth so you can see your progress. With steady care, you’ll help the ceiling look cleaner and feel a lot less stressful.
Repeat For Deep Discoloration
Whether the stain still looks shadowy after you scrub, don’t worry, because stubborn mold marks often require a second round.
Mix a fresh batch of cleaner, then apply it to the dark patch and let it sit a little longer.
You’re not failing, you’re doing color correction with care.
Gently scrub again, then wipe the area with a clean damp cloth.
In case the ceiling still looks uneven, repeat the process once more, but stop before you soak the paint.
Afterward, dry the spot well so the mold doesn’t return.
Should the finish look worn, you might need texture matching and a small touch-up later.
For now, you’re helping your bathroom look clean again, and that’s a win worth keeping.
Best Cleaners for Bathroom Ceiling Mold
Whenever you face mold on your bathroom ceiling, you’ve got a few strong cleaners to choose from.
Whenever bleach solutions can help with tough surface stains, while vinegar treatments offer a gentler option for everyday use.
Whenever mold-specific cleaners can also make the job easier because they’re made to target mold fast and give you a little extra peace of mind.
Bleach Solutions
Bleach solutions can tackle bathroom ceiling mold fast, and that makes them a popular choice provided you want quick, visible results.
Mix one part bleach with three parts water, then wear gloves and open a window. You’ll protect yourself and keep bleach safety front and center while you work.
Apply the mix with a sponge or spray bottle, and let it sit briefly before wiping the area clean.
For stubborn spots, repeat the process once.
Supposing you prefer bleach alternatives, choose a cleaner made for mold and follow the label closely.
You don’t need to feel stuck with a grim ceiling. With steady care, you can bring back a fresher space and feel good walking into your bathroom again.
Vinegar Treatments
Vinegar can step in as a simple, low-cost cleaner once bathroom ceiling mold starts to spread. You can spray food grade vinegar straight onto the spot and let it sit for an hour, so it has time to loosen the growth. Then you wipe gently with a soft cloth and dry the area well.
Should you like a cleaner home routine, this method can feel easy and familiar. Vinegar also brings a natural enzyme action that helps decompose surface buildup without a harsh smell hanging around.
For best results, you should repeat the treatment whenever you notice new specks. After that, keep the bathroom aired out and check the ceiling often, because a steady habit helps you and your space stay comfortable.
Mold-Specific Cleaners
Provided the vinegar treatment didn’t fully clear the spot, a mold-specific cleaner can give you a stronger, more targeted option. You’ll feel better aware you’re using a product made for this job, not just a guess in a spray bottle. Choose one with enzyme cleaners or botanical extracts when you want a gentler scent and solid cleanup power.
| Cleaner Type | Best Use | Note |
|---|---|---|
| Enzyme cleaners | Organic mold on painted ceilings | Breaks down residue well |
| Botanical extracts | Light to moderate spots | Smells fresher, often milder |
| Foaming sprays | Stubborn ceiling patches | Clings so you can wipe less |
First, assess a small area. Then spray, wait, and wipe with a soft cloth. After that, dry the ceiling fast so mold doesn’t come back and crash your bathroom party.
Dry the Ceiling Thoroughly
Once you’ve scrubbed away the mold, you need to dry the bathroom ceiling completely so the problem doesn’t come right back. Use a fan, open the door, and let air flow move moisture away from the surface.
Should you possess humidity meters, check the room until the numbers drop to a safe range. Wipe any damp spots with a clean microfiber cloth, then keep the area dry for several hours.
Should the ceiling still feels cool or sticky, give it more time. You want every patch to feel dry to the touch before you stop. This step could seem simple, but it protects the work you already did and helps you feel confident that your bathroom is truly clean again.
Improve Bathroom Ventilation
Fresh air can do a lot of heavy lifting here, so give your bathroom a better path for moisture to escape. Start by running the exhaust fan during showers and for 20 minutes after, because steady airflow helps your ceiling dry out faster.
In case you have a window, open it whenever weather allows and consider window placement should you ever remodel, since smart placement can support airflow optimization all day. Also, keep the fan grille clean, so it can move air without working harder than it should.
Should your fan sound weak, you might need a stronger model that fits the room. You’re not fixing this alone, and that’s okay. Small ventilation upgrades can make your bathroom feel fresher, calmer, and a lot less like a steam room.
Cut Down on Bathroom Moisture
You can cut down on bathroom moisture through improving shower ventilation right away, so steam doesn’t hang around and feed mold on the ceiling. Open the window, run the fan during and after showers, and keep the air moving while the room clears out.
Then dry wet walls, tile, and fixtures fast with a towel or squeegee, because every damp surface gives mold one more chance to settle in.
Improve Shower Ventilation
Because bathroom moisture builds up fast, improving shower ventilation is one of the smartest ways to help stop mold from coming back on the ceiling. You can install exhaust fans that pull damp air outside, and that simple move helps your bathroom feel fresher right away.
In case your fan already works, make sure it runs long enough during and after showers so steam doesn’t hang around. You can also choose humidity sensors, which turn the fan on whenever the air gets too wet, so you don’t have to guess.
Open a window whenever weather allows, too, because fresh air gives the room a break. Whenever your shower space breathes better, you protect your ceiling, and your bathroom stays more comfortable for everyone who uses it.
Dry Surfaces Fast
To dry surfaces fast, start right after the shower ends, while the room still feels warm and damp. You can wipe the mirror, tile, and sink with a clean towel, then hang that towel to dry.
Next, use quick dryers, like a handheld fan or a squeegee, to push water off walls and glass before it settles. Should you keep a small basket of fresh cloths nearby, you’ll make the job easier on busy mornings.
Also, check moisture sensors supposing your bathroom has them, because they can warn you whenever the air stays too wet. Then crack the door open and let air move through.
Whenever you dry surfaces quickly, you help your bathroom feel cleaner, calmer, and more like the fresh space you deserve.
Use Mold-Resistant Ceiling Paint
A fresh coat of mold-resistant ceiling paint can help protect your bathroom after you clean away the mold. You give the room a cleaner look, and you also add a shield against damp air.
Before you paint, apply mildew resistant primers so the new finish grips well and stays steady. Then choose moisture barrier coatings that help block water from soaking into the ceiling.
This step matters most in small bathrooms, where steam hangs around after showers and makes trouble fast. You don’t need a big project to feel better about the space.
With the right paint, you can keep your ceiling looking fresh and make your bathroom feel cared for, calm, and ready for daily use.
When Mold Requires Ceiling Repair
Fresh paint can conceal stains, but it can’t fix a ceiling that’s already breaking down.
In case the mold keeps coming back after you clean it, you could be confronting structural damage.
You might see soft spots, sagging drywall, or cracks that spread. Those signs mean the ceiling needs more than surface care.
Also, should water damage have soaked the area above the ceiling, concealed insulation issues can trap moisture and feed mold again.
At that point, repair helps protect your home and your peace of mind.
You don’t have to guess alone. A small patch can work for minor spots, but larger damage calls for replacement.
Whenever you act promptly, you give your bathroom a safer, sturdier ceiling and a cleaner place to breathe.
How to Prevent Mold on Bathroom Ceilings
Even after you clean the mold, you can keep it from returning through changing the damp conditions that let it grow in the initial place.
Start by running the exhaust fan during every shower and for 20 minutes after. Should your bathroom stays muggy, use humidity meters to check the air and aim for under 50 percent. Open a window whenever you can, and leave the door cracked to help fresh air move through.
Next, fix leaks fast, because even a small drip can feed mildew. Wipe wet walls and ceilings after bathing, and skip long steamy showers whenever possible.
Also, check ceiling insulation above the room, since cold surfaces can trap moisture.
With these habits, you help your bathroom feel cleaner, safer, and easier to share.
Frequently Asked Questions
Can Bathroom Ceiling Mold Make You Sick?
Yes, bathroom ceiling mold can make you sick. You might notice health risks like coughing or allergy symptoms, especially if you are sensitive. You deserve a home that feels safe, comfortable, and healthy.
Is Black Mold on Ceilings Always Dangerous?
Not always. Black mold can look like a storm cloud, but its toxic appearance doesn’t prove danger. You’ll need species identification to know the real risk, and you’re not alone in checking carefully.
How Often Should I Inspect My Bathroom Ceiling for Mold?
You should inspect it monthly and add seasonal inspections after humidity spikes or leaks. You will catch mold promptly, keep your space welcoming, and protect the bathroom everyone in your home shares.
Can I Paint Over Mold Stains After Cleaning?
Yes, you can paint over cleaned mold stains, but only after you seal them first. Like shadows under fresh paint, stains can return. Use a mildew resistant primer and a stain blocking sealer so your ceiling stays welcoming.
Should I Hire a Professional for Small Mold Spots?
Yes, you should if you are unsure, have health risks, or notice recurring spots. A professional will protect your home, help you avoid legal concerns, and prevent you from having to tackle it alone.



