A $15 smart-strip kit can shave roughly $8 a month off the always-on draw of TVs, game consoles, and cable boxes, paying for itself within two billing cycles. Weatherstripping a drafty front door usually outperforms a flashy solar film that never quite earns back its price tag, because sealing existing losses costs pennies per linear foot while solar films rarely move the cooling needle in temperate climates.
Ranked by months to recoup rather than by category, the smartest budget-friendly sustainable living upgrades quietly shrink a carbon footprint while padding your wallet.
This walkthrough ranks thrifty eco upgrades by how quickly they pay themselves back, helping budget-minded homeowners and renters cut bills without chasing hype. It covers weatherstripping tricks, sub-$50 weekend wins, and climate-specific picks.
Why Payback Period Beats Category When Picking Upgrades
Payback period is the number of months of utility savings it takes to equal the upfront cost of an upgrade. A $30 smart power strip that saves $4 a month on phantom load recoups its cost in about 7 months, while a $600 attic insulation job that saves $25 a month takes 24 months. Both are useful, but the power strip wins the priority slot when capital is limited.
National-average savings figures from press releases almost always overstate what an individual household will capture, because they blend leaky pre-war homes with tight new builds. That gap between advertised and actual savings breeds skepticism fast, and once burned, most households abandon the whole idea of energy efficiency upgrades as marketing fluff.
Your fix is personal arithmetic: pull a 30-day baseline of kilowatt-hours and gallons, then multiply by the percentage reduction a project actually delivers in your home.
A dollar spent on weatherstripping returns more than the same dollar spent on solar films, even though solar feels intuitively more “sustainable” on a label. Weatherization plugs existing losses in the building envelope for pennies per linear foot, while solar films rarely deliver enough cooling reduction in temperate climates to justify the install.
Every month without weatherstripping leaks roughly $15 to $30 of conditioned air through gaps you could seal in an afternoon, which is the hidden cost of inaction that makes the choice feel urgent.
Quick Wins You Can Finish in a Single Weekend for Under $50
LED Bulbs and Smart Power Strips
Swapping ten incandescent bulbs for LED bulbs costs about $40 at any Lowe’s or Home Depot and saves roughly $100 per year on the electric bill. Each LED lasts 15 to 25 times longer than the filament bulb it replaces, so your ladder and trash bag come out far less often.
Smart power strips run $15 to $30 and kill the 5 to 10 percent phantom load that idle electronics draw around the clock from TVs, game consoles, and countertop appliances.
Low-Flow Fixtures and Aerators
Low-flow showerheads and aerator faucets cut water use 40 to 50 percent without a noticeable pressure drop, and most EPA WaterSense-certified models cost under $20 each. A family of four can save about 7,000 gallons a year just from the showerhead swap, which shows up on both the water and the water-heating bill. Aerators thread onto existing faucets in minutes with no tools, making them the cleanest renter-friendly project on the list.
Weatherstripping, Caulk, and Door Sweeps
Placing weatherstripping around doors and caulk along window trim cuts heating and cooling costs 10 to 20 percent, often the single biggest percentage win in the whole house. A basic kit, including foam tape, silicone caulk, and a door sweep, costs about $25 and pays for itself within the first two billing cycles. These affordable eco-friendly home improvements deliver immediate comfort gains on top of the savings.
Each quick win below carries a real timeline so you can see exactly when the weekend project turns into recovered dollars.
Skip the caulk gun if you rent. Removable foam tape and a self-adhesive door sweep pull off cleanly at move-out and leave zero residue on paint or trim.
The Payback Ladder: Ranking Projects by Months to Recoup
Sorting upgrades by months to recoup turns a fuzzy wish list into a concrete priority queue. The table below groups the most common low-cost green home renovations into four tiers based on how fast they pay for themselves at national-average rates. Your exact months will shift with local utility prices, but the tier order stays stable across nearly every US climate zone.
| Tier | Typical Upgrades | Upfront Cost | Months to Recoup |
|---|---|---|---|
| 1 (under 6 months) | LED bulbs, smart power strips, low-flow aerators, foam weatherstripping | $10 to $40 each | 1 to 5 |
| 2 (6 to 18 months) | Programmable thermostat, water-heater insulation blanket | $30 to $80 | 6 to 18 |
| 3 (1 to 3 years) | ENERGY STAR appliance at end-of-life, faucet and shower replacement | $300 to $900 | 12 to 36 |
| 4 (3+ years) | Attic insulation to R-49, rain barrel system, composting setup | $500 to $2,000 | 36 to 84 |
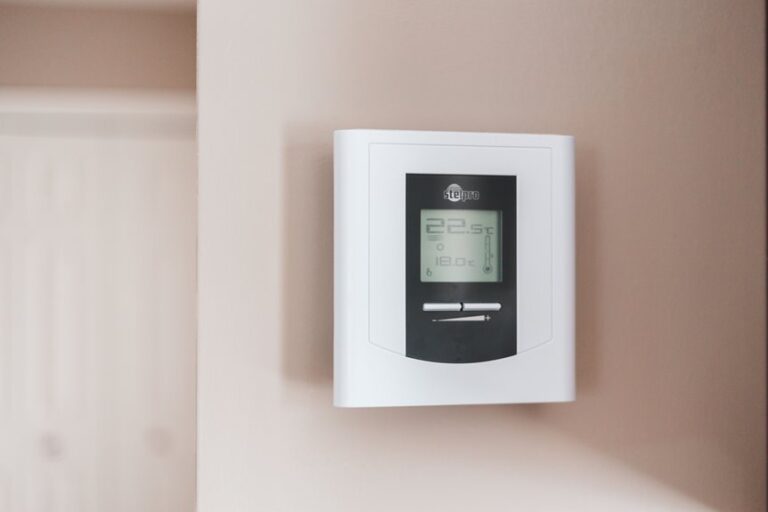
Tier 1 projects are the highest-confidence first moves because they cost little and produce a verifiable bill reduction in the next cycle. Tier 2 holds the steady, measurable HVAC savings from a programmable thermostat (or a smart thermostat like Nest or Ecobee) and a pre-cut water-heater insulation blanket that drops standby heat loss.
Tier 3 only makes sense when an existing fridge, washer, or dishwasher is already near end-of-life; ENERGY STAR appliances use 10 to 50 percent less energy than the standard versions they replace, so the savings stack on top of the forced replacement.
Tier 4 includes the slower-payback projects like attic insulation, rain barrels that can save up to 1,300 gallons a year, and composting setups that divert roughly 30 percent of household waste from landfills, where behavior change and durability compound quietly over a decade.
Renter-Safe Moves Versus Projects That Need to Stay Put
The Renter-Friendly Shortlist
Removable weatherstripping, plug-in LEDs, smart strips, aerator faucets, over-door hooks, and Command-mounted window film all come off the wall without damage and walk out with you at move-out. Tenants in roughly 35 percent of US households avoid energy upgrades entirely because they assume everything requires a drill or a permit, which is simply untrue. Every item above costs under $30 and installs in minutes with no tools beyond a screwdriver and a rag.
Homeowner-Only Upgrades
Full attic insulation, permanent appliance swaps, hardwired caulking around exterior cladding, and rain-barrel plumbing tie-ins all require drilling, sealing, or rewiring that voids leases. These projects typically deliver bigger percentages but assume you control the asset long enough to capture the multi-year payback. Save them for when you sign a multi-year mortgage or renew a long-term rental with explicit permission.
The 30-Second Lease Check
Before drilling, sealing, or swapping a thermostat, confirm three things with the landlord in writing: whether the lease allows modifications, whether any project requires professional reinstallation at move-out, and whether the landlord will share the savings through a rent credit or reduced deposit. A clear email reply is usually enough documentation to protect your deposit.
Some landlords will split the cost of a smart thermostat or new weatherstripping in exchange for a documented rent credit or a longer lease term, which is a clean way to fund a $60 upgrade at half price.
Renters can negotiate upgrades, yet the savings math shifts sharply once your local climate and rate plan enter the picture.
Matching Upgrades to Your Climate and Utility Bill
Cold-North Priorities
In climates where winter heating drives 50 to 70 percent of the annual bill, insulation, weatherstripping, and heating-source efficiency dominate the priority list. Air-sealing the attic hatch and adding a water-heater insulation blanket deliver bigger savings than a new smart thermostat in this zone. Seal the envelope before you tune the thermostat, since heat lost through gaps will defeat any thermostat setting.
Hot-South Priorities
Across the Sun Belt, cooling savings outweigh heating losses for most of the year, which pushes window treatments, attic insulation, and reflective roofing toward the top of the list. A radiant barrier in the attic can shave 5 to 10 percent off summer cooling costs for a few hundred dollars in materials. Window film installed on west-facing glass keeps late-afternoon sun from turning the living room into a greenhouse without altering the view.
Hot-Dry Versus Humid-Coastal Splits
Desert climates benefit from evaporative cooling support, shade structures, and high-SEER window units, while humid coastal zones lean on dehumidification, whole-house ventilation, and mold-resistant insulation. The same percentage reduction can deliver wildly different dollars in these zones because baseline usage differs by a factor of three or more. Cross-check local utility bill averages before locking in a project list.
The Personal Savings Formula
Multiply your current monthly kWh or gallons by the upgrade’s percentage reduction, then divide by the upfront cost to confirm the payback in months. A household using 1,000 kWh a month that swaps to LED and saves 8 percent on lighting captures 80 kWh saved at roughly $0.16 per kWh, or about $13 per month, against a $40 bulb cost, for a 3-month payback.
Running that math for every project takes about ten minutes and protects you from the generic 5 to 15 percent savings claims that flood product pages.
Confirming payback on your own terms also exposes which rebates actually stack on top of that calculation.
Where to Find Rebates That Quietly Double Your ROI
Layering Federal, State, and Utility Offers
A $40 programmable thermostat can drop to about $15 once a utility rebate and a state credit land on the same invoice, because federal, state, and utility incentives routinely stack on a single upgrade. The Database of State Incentives for Renewables and Efficiency (DSIRE) and the ENERGY STAR rebate finder let you search by zip code and surface local offers most listicles never check.
Confirm the rebate is active before purchase, since program funding windows open and close quietly each quarter.
Common Rebate Mistakes
Missing deadlines, failing to file the right invoice, or buying a non-qualified model that looks ENERGY STAR but is not on the rebate list are the three fastest ways to lose a rebate. Rebate paperwork often requires the model number, the purchase date, and sometimes a photo of the installed product, so keep receipts and serial numbers together in one folder.
Some utilities also require a post-installation inspection within 90 days, so schedule that visit the day you buy the unit.
Timing Purchases Around Rebate Cycles
Rebate budgets typically reset in January and bonus promos tend to cluster around Earth Day in April, so scheduling a purchase inside one of those windows can layer a seasonal discount on top of an annual rebate. A $40 programmable thermostat purchased during a spring promo with a $25 utility rebate becomes a $15 thermostat, which is a 4-month payback against roughly $4 of monthly savings.
That kind of stacking is the single fastest way to compress the payback ladder.
Mistakes That Drain Savings Before the First Bill Arrives
The Halo Tax Trap
Premium green products often deliver identical performance to mid-tier versions for 90 percent of the savings, so the extra $20 to $50 you spend on a designer fixture rarely returns through lower bills. A $15 LED bulb and a $4 LED bulb from the same product family produce the same lumens and the same wattage draw, so the only difference is the brand embossed on the base.
Buy mid-tier as a default and reserve premium purchases for fixtures where dimming or color quality actually matters.
Sealing a Home Too Tight
Air-sealing without verifying ventilation traps moisture inside wall cavities and spikes mold risk, especially in bathrooms and kitchens. Mechanical ventilation like a bathroom exhaust fan rated for the room’s square footage, or a continuous fresh-air supply, is the partner project that keeps airtight homes healthy. Seal the envelope and add controlled ventilation in the same week so humidity stays below 50 percent indoors.
Overlooking the Biggest Energy Users
Heating, cooling, and water heating together account for roughly 60 percent of residential energy use, so chasing savings on lighting while the HVAC system runs uninsulated is like bailing a boat with a coffee mug. A quick thermal inspection of the attic, water-heater closet, and around the HVAC air handler usually surfaces the single largest leak in the building. Address the building envelope and the water heater before chasing smaller loads like phone chargers and standby TVs.
Skipping the Baseline
Without a 30-day snapshot of current bills and usage, post-upgrade savings become impossible to prove and easy to dismiss as seasonal noise. Pull your last 12 months of utility statements, mark the highest and lowest months, and treat the average as your baseline before you touch a single product. That single habit separates households that capture real ROI from those who spend $500 and swear they never saw a difference.
The Bottom Line
Rank every project by months to recoup, not by how green it looks on the box. Start with the Tier 1 quick wins that pay for themselves before the next billing cycle ends, then layer rebates on top to compress the math further. A payback-first framework turns sustainability into a steady monthly cash flow rather than a one-time expense.
FAQ
What are the cheapest upgrades to make a home more sustainable?
LED light bulbs, smart power strips, low-flow aerators, and weatherstripping together cost under
FAQ
00 and typically pay for themselves in under six months. Each project targets a different utility line, so the savings stack across electricity, water, and heating bills in the same quarter.Do inexpensive home upgrades really save money on energy bills?
Yes, provided you measure a 30-day baseline before the project and a 30-day window after the install. National averages suggest 10 to 20 percent reductions from weatherization and roughly
FAQ
00 per year from LED swaps, which is verifiable on any modern utility statement.Which eco-friendly home improvements pay for themselves the fastest?
LED light bulbs and aerator faucets usually recoup in under three months because the upfront cost is low and the savings show up on the very next bill. Foam weatherstripping and smart power strips follow close behind at one to five months in most homes.
Can renters make sustainability upgrades without permanent changes?
Removable weatherstripping, plug-in LEDs, smart strips, aerator faucets, and Command-mounted window film all come off the wall without damage and walk out with you at move-out. Every item costs under $30 and installs in minutes with no tools beyond a screwdriver and a rag.
How much can I save by switching to LED bulbs and low-flow fixtures?
Swapping ten incandescent bulbs for LED bulbs costs about $40 and saves roughly
FAQ
00 per year on the electric bill. A family of four can save about 7,000 gallons a year from a low-flow showerhead swap, which also trims the water-heating bill in the same month.What is the easiest DIY weatherization project for beginners?
Foam weatherstripping and a self-adhesive door sweep form the cleanest starter kit, costing about
What are the cheapest upgrades to make a home more sustainable?
LED light bulbs, smart power strips, low-flow aerators, and weatherstripping together cost under $100 and typically pay for themselves in under six months. Each project targets a different utility line, so the savings stack across electricity, water, and heating bills in the same quarter.
Do inexpensive home upgrades really save money on energy bills?
Yes, provided you measure a 30-day baseline before the project and a 30-day window after the install. National averages suggest 10 to 20 percent reductions from weatherization and roughly $100 per year from LED swaps, which is verifiable on any modern utility statement.
Which eco-friendly home improvements pay for themselves the fastest?
LED light bulbs and aerator faucets usually recoup in under three months because the upfront cost is low and the savings show up on the very next bill. Foam weatherstripping and smart power strips follow close behind at one to five months in most homes.
Can renters make sustainability upgrades without permanent changes?
Removable weatherstripping, plug-in LEDs, smart strips, aerator faucets, and Command-mounted window film all come off the wall without damage and walk out with you at move-out. Every item costs under $30 and installs in minutes with no tools beyond a screwdriver and a rag.
How much can I save by switching to LED bulbs and low-flow fixtures?
Swapping ten incandescent bulbs for LED bulbs costs about $40 and saves roughly $100 per year on the electric bill. A family of four can save about 7,000 gallons a year from a low-flow showerhead swap, which also trims the water-heating bill in the same month.
What is the easiest DIY weatherization project for beginners?
Foam weatherstripping and a self-adhesive door sweep form the cleanest starter kit, costing about $25 and cutting heating and cooling costs 10 to 20 percent. The job takes an afternoon, requires no special tools, and pays for itself within the first two billing cycles.
Are smart power strips worth the cost?
At $15 to $30 per strip, they kill the 5 to 10 percent phantom load that idle electronics draw around the clock from TVs, game consoles, and countertop appliances. Most households recoup the cost in under five months and keep the savings rolling for the life of the strip.
Where can I find rebates or tax credits for affordable green home upgrades?
Federal tax credits, state programs, and utility-specific rebates often stack on the same upgrade, and the Database of State Incentives for Renewables and Efficiency (DSIRE) plus the ENERGY STAR rebate finder let you search by zip code. Confirm the rebate is active before purchase, since program funding windows open and close quietly each quarter.
Which home upgrades save the most energy?
Weatherstripping and air-sealing usually deliver the biggest percentage reduction, often 10 to 20 percent on heating and cooling. Adding attic insulation to the recommended R-value for your climate zone follows close behind and compounds the savings for decades.
How can I make my home eco-friendly on a budget?
Layer rebates on top of the Tier 1 quick wins first, then redirect the monthly savings into Tier 2 projects like a programmable thermostat. Stacking a utility rebate with a seasonal promo can cut upfront costs by half and keep the payback inside a single billing cycle.
Do sustainable home improvements really reduce utility bills?
Yes, and the reduction is verifiable on any modern utility statement once you have a 30-day baseline in hand. Weatherization delivers 10 to 20 percent reductions and LED swaps deliver roughly $100 per year for most households, with the savings stacking across electricity, water, and heating lines.
What is the best inexpensive upgrade to lower a home’s carbon footprint?
Switching to LED lighting delivers the fastest carbon reduction per dollar because it cuts electricity demand immediately and the bulbs last 15 to 25 times longer than incandescents. Weatherstripping is a close second because it reduces heating fuel use, which often carries a higher carbon intensity per dollar spent.
5 and cutting heating and cooling costs 10 to 20 percent. The job takes an afternoon, requires no special tools, and pays for itself within the first two billing cycles.