Address
304 North Cardinal
St. Dorchester Center, MA 02124
Work Hours
Monday to Friday: 7AM - 7PM
Weekend: 10AM - 5PM
Address
304 North Cardinal
St. Dorchester Center, MA 02124
Work Hours
Monday to Friday: 7AM - 7PM
Weekend: 10AM - 5PM

Nearly 85% of U.S. homes have hard water, so limescale on faucets is a common headache you didn’t ask for. If your tap looks cloudy or crusty, you can clear it without harsh scrubbing or damage. The trick is to match the right cleaner with the finish, then work gently so you lift the buildup instead of scratching the metal, and the easiest method could surprise you.
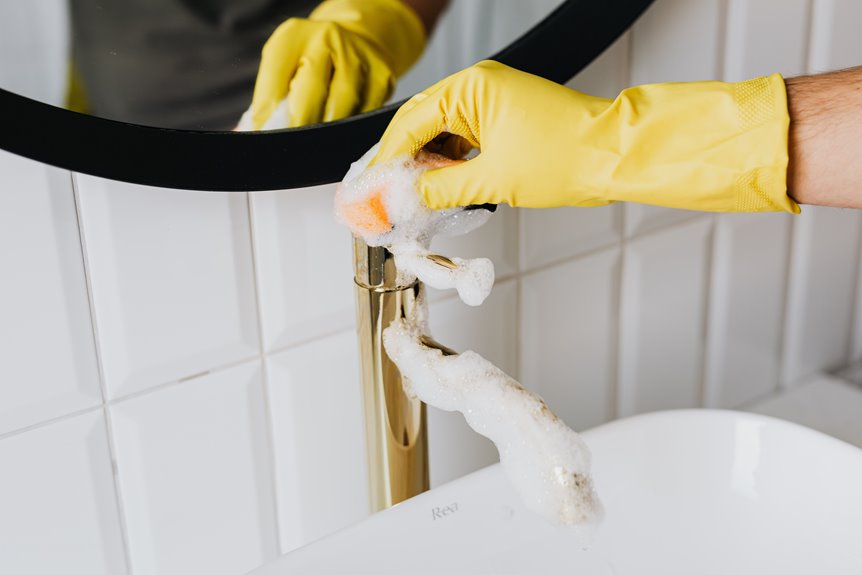
Hard water causes limescale on faucets in most U.S. homes, and it can be removed without harsh scrubbing. Choose a cleaner that is safe for your faucet’s finish, such as white vinegar for chrome or a mild descaler for brass and bronze. Soak removable parts or wrap a vinegar-soaked cloth around fixed fixtures to loosen buildup. Gently wipe or brush with a soft toothbrush to lift deposits rather than scratching the surface. Finish with a rinse and dry to prevent new mineral deposits.
Even though your faucet looks clean, limescale can start building up as hard water keeps flowing through it every day. Once that water dries, it leaves behind calcium and magnesium. Those minerals cling to the metal and create mineral buildup over time.
You could notice a chalky film, rough spots, or dull patches around the spout and handle. In case your area has hard water, you’re not alone, and this happens in many homes.
Warm water and steady use can make the deposits settle faster, especially where droplets sit after each use. Small stains may seem harmless at the outset, but they grow as more water passes through.
Start with gathering a few simple supplies so the job feels less stressful straightaway. You’ll want a small bowl, soft cloths, a nonabrasive sponge, and protective gloves. Add a toothbrush for tight spots, plus a towel to keep the sink dry. Should you like a fresher workspace, choose a cleaner with mild odor control so the room stays comfortable while you work.
| Supply | Why it helps |
|---|---|
| Protective gloves | Keep your hands safe |
| Soft cloths | Protect the finish |
| Sponge | Lift buildup gently |
| Toothbrush | Reach tiny edges |
| Towel | Catch drips fast |
When you set these items out initially, you move with more confidence. It also helps you stay organized, and that makes the whole task feel more manageable for yourself.
You can loosen stubborn limescale by soaking the faucet parts in vinegar, which helps dissolve the chalky buildup without much effort.
After that, gently scrub the softened deposits with a soft brush or cloth, so you don’t scratch the finish.
Then rinse the area well and polish it dry to bring back a clean, bright shine.
As soon as limescale starts clouding your faucet, vinegar can feel like a simple rescue instead of a chore. You’re not alone in this; plenty of homes fight the same chalky buildup. Mix equal parts white vinegar and water, or use stronger vinegar concentration for stubborn spots, then soak a cloth or paper towel in it.
Wrap it snugly around the faucet and let the soak duration run for 20 to 30 minutes. Keep the fit tight so the acid stays in place and does its quiet work. Should your faucet has delicate finishes, trial a small spot initially. This gentle soak gives you a calm, practical initial step, and it sets you up nicely for the next cleanup stage.
Once the vinegar has loosened the crust, gently scrub the faucet with a soft toothbrush, sponge, or non-scratch pad.
You’re not fighting the faucet; you’re just lifting what’s left behind. Work in small circles, and let the bristles reach around handles and seams where mineral deposits hide.
Should you meet a stubborn spot, add a little more vinegar and keep going.
Move slowly and steady, and you’ll keep the process calm and manageable.
Your faucet can look cared for, and you can feel good about the effort.
Rinse the faucet well with clean water to wash away the vinegar and loosened limescale, then dry it right away with a soft microfiber cloth so no new spots can form.
You’ll want to use distilled water for the final rinse in case your tap water leaves marks, because that small step helps you keep the shine you worked for.
After that, buff the surface with polishing cloths in small circles. This gives the metal a smooth, bright finish and helps you feel proud of the result.
Should you notice a dull patch, wipe it again before it dries.
Around the base and handle, take your time so every part looks cared for. A gentle polish also makes cleanup feel easier next time.
Grab a lemon and let its natural acid do the heavy lifting for you. You can make your faucet shine with simple lemon chemistry, and you don’t need fancy supplies. Cut the lemon, rub the juicy side over the crusty spots, and let the juice sit for a few minutes so it can soften the white buildup.
Then wipe with a damp cloth and rinse well. Should you want a gentler touch, wrap a lemon slice around the spout and hold it with a small band.
With a little care, you’ll feel right at home doing this.
Should the white crust feel stubborn, baking soda can help break it down without scratching the faucet finish. Make a thick paste with baking soda and a little water, then spread it over the limescale. Let it sit for 10 to 15 minutes so it can soften the buildup.
After that, rub gently with a soft cloth or sponge, and you’ll see the grime start to lift. For thicker spots, you can repeat the homemade pasteways until the surface looks cleaner.
This step works well whenever you want a simple fix that still feels safe and familiar. It’s a friendlier choice than harsh abrasive alternatives, and it gives you more control.
Once you wipe it away, use warm water and dry the faucet well.
Even after the outer crust is gone, limescale often conceals itself in the small places that matter most, like the faucet aerator and the narrow seams around the spout. You’re not missing anything, so don’t worry. For good aerator maintenance, unscrew the tip, then soak it in vinegar so the grit loosens. Use an old toothbrush to sweep the screen and wash away flakes.
Then turn to the concealed crevices with a cotton swab dipped in vinegar.
If water still looks weak, check for more buildup and repeat the soak. You’re helping your faucet breathe again, and that small win feels good.
Chrome shines fast, brass warms up a room, and nickel sits somewhere in between, but all three can lose their glow under the same chalky buildup.
You can bring them back with a soft cloth, warm water, and a little mild soap. Wipe gently, then rinse and dry right away so spots don’t settle in.
For brass, check initially whether it has a protective lacquer. Should it, keep your touch light, because harsh scrubbing can wear it down.
In case you care for antique restoration pieces, trial any cleaner on a concealed spot before you go дальше.
On chrome and nickel, a soft toothbrush helps lift grime near curves and seams.
You’re not fixing a flaw, you’re helping a fixture feel at home again.
Most faucet cleaners need only a short soak, because limescale softens faster than you could envision. You don’t need to hover nervously; just give the cleaner enough soaking time to work, then check it. For most faucets, 5 to 15 minutes is enough, and that small window helps you stay in control.
If the buildup still looks stubborn, you can reapply instead of rushing. That way, you protect your faucet and keep the job calm and manageable.
With the right timing, you fit right in with people who clean smart, not hard.
Use a soft cloth, sponge, or old toothbrush so you can lift the limescale without scratching the faucet.
Move in small, gentle circles and let the cleaner do most of the work, since hard scrubbing can wear down the finish fast.
In case you stay light with your touch, you’ll protect the shine and keep the faucet looking clean instead of battle-scarred.
A little patience goes a long way here, because soft tools can lift limescale without leaving ugly scratches behind. You’re part of a careful cleaning crew now, and that feels good. Use soft brushes, microfiber cloths, and other gentle helpers on the faucet surface. They let you work around tight spots while keeping the finish safe.
That mix keeps control in your hands and helps your faucet look cared for, not scuffed. As you select soft tools, you protect the shine and make the job feel easier from the outset.
Now that your faucet is protected with soft tools, keep your hand calm and let the motion do the work. You don’t need pressure to beat limescale; you need rhythm. Hold the cloth or sponge lightly, then make gentle circulars around the cloudy spots.
In case the buildup sits in a crease or near the base, switch to feathered strokes and follow the shape of the surface. This helps you stay in control and keeps the cleaning friendly to your faucet.
Check your progress often, and pause provided the spot starts to look clear. Should a patch still clings, go back with slow circles instead of pressing harder. You’re aiming for steady contact, not force. That way, you join the stain’s undoing without turning the job into a battle.
Protecting your faucet finish matters just as much as removing the white crust, because one rushed swipe can leave tiny scratches that you’ll notice every time you wash your hands. You can keep the surface safe and still beat limescale when you choose soft tools and a calm touch.
Whenever you work this way, you protect the shine and still feel in control. That matters, because your kitchen or bath should look cared for, not worn down due to a quick cleanup.
Once you’ve lifted away the limescale, give the faucet a good rinse with clean water so no cleaner or loosened bits stay behind. Then dry it right away with microfiber cloths, since water spots can sneak in fast.
You can use a gentle polishing technique by rubbing in small circles with light pressure. This helps bring back the shine without stressing the finish.
Should the faucet still looks a little dull, buff it again with a fresh cloth until it feels smooth and bright. Take your time here, because a careful final wipe makes the whole sink area look cared for and welcoming.
As you step back, you’ll see that clean sparkle everyone loves, and your faucet will feel like part of a well-kept home.
You can stop limescale before it starts through drying your faucet after each use, since leftover water leaves mineral spots behind.
Should your water be hard, a water softener can help reduce buildup at the source, and a quick vinegar cleaning now and then keeps tiny deposits from getting cozy.
With these simple habits, you’ll spend less time scrubbing and more time enjoying a faucet that stays cleaner longer.
Drying your faucet after each use can make a bigger difference than it seems, especially should your water leave behind chalky white spots. Whenever you give it a hand towel or a quick wipe, you stop droplets from sitting and drying into crusty marks. It only takes a moment, and it helps your kitchen or bathroom feel cared for, not neglected.
You don’t need to work harder, just stay consistent. That small daily step helps you feel in control, and your faucet stays brighter with less effort.
Should you already wipe your faucet after each use, you’re halfway to a cleaner finish, but hard water can still keep leaving behind stubborn mineral marks. To stop that cycle, you can install a water softener that treats the whole house before the water reaches your taps. This helps you and your home feel a little more protected from chalky buildup.
Whenever you choose a unit, check the salt regeneration setting so it matches your water use and keeps working well. You should also do salt checks now and then, because the right level keeps the system steady. With that support, your faucet stays smoother, and you spend less time scrubbing. It’s a small upgrade, but it can make your kitchen feel easier to care for.
A quick vinegar wipe can stop limescale before it turns into a stubborn ring on your faucet. You don’t need a big cleaning day to keep your sink looking cared for. Just make this part of your routine, and your faucet will stay friendlier to you.
If vinegar smell bugs you, try vinegar alternatives like lemon juice for light buildup. Then dry the faucet with a clean towel, because water spots love a comeback.
Whenever you clean often, you join other people who keep their bathrooms bright, simple, and easy to enjoy.
Should the buildup keeps coming back after you clean, it could be time to call in extra help.
If you notice weak water flow, leaks, or cloudy spots that won’t budge, you might need when to call a plumber.
A pro can check inside the fixture and spot concealed damage before it gets worse.
You should also consider warranty considerations, since harsh tools or strong cleaners can void coverage. That matters when your faucet still has life left in it.
If you live in a home with older pipes or shared plumbing, getting backup can save you stress and keep your sink working for everyone.
You’re not giving up. You’re protecting your space and choosing the smarter path.
Yes, limescale can permanently damage your faucet’s finish if left untreated for long enough. You may notice corrosion of the finish and a decline in appearance, so clean it promptly to keep your fixtures looking cared for and welcoming.
No, you don’t need hard water alone to see that chalky veil; mineral deposits can rise from warm water, evaporation, and neglected spray, leaving your faucet looking tired and shared among every busy home.
You should descale your bathroom faucet monthly for maintenance, and do a seasonal deep cleaning if you notice buildup. That way you will keep your space fresh, cared for, and part of a clean routine.
Yes, you can use store bought descalers instead of vinegar. Commercial descalers often work faster and are better for stubborn buildup, but you should follow the product label carefully. For severe scale, professional treatment may be needed.
Yes, sometimes it will help: limescale can restrict flow and cause pipe clogging, but valve corrosion or deeper plumbing issues might still limit pressure. You are not alone — check the faucet, then the supply line next.
