Plumbing and the building envelope deserve immediate attention: disconnect outdoor hoses, shut off and insulate hose bibbs, let vulnerable faucets drip overnight, and set the thermostat no lower than 55°F. A hard freeze becomes a pipe-bursting emergency once temperatures stay at or below 20°F for several hours, so sealing drafts around windows, doors, and attic bypasses matters just as much as protecting pipes.
This practical walkthrough walks new homeowners through every freeze-prep step, from staging supplies and insulating hose bibbs to sealing drafts and heating the house safely during the coldest hours.
Understanding Freeze Risks Before the Temperature Drops
A burst pipe can release hundreds of gallons of water per hour, and the average insurance claim for freeze-related plumbing damage runs into five-figure territory. That financial shock, more than the cold itself, drives most emergency calls the morning after a hard freeze.
The Temperature Threshold That Triggers Real Damage
Water in supply lines begins to freeze once pipe surfaces drop to about 20°F, but pipes rarely sit at outdoor air temperature. An uninsulated pipe running through an unheated crawl space can reach freezing while the air around it reads 28°F. Duration matters as much as temperature: a half-hour dip rarely ruptures a pipe, but six to eight hours below freezing can, especially in homes with poor insulation or plumbing routed through exterior walls.
Where the Home Breaks First
Outdoor hose bibbs lead the casualty list because they sit fully exposed and connect to water that has nowhere to retreat. Attic and crawl space pipes rank second, since heated air rarely reaches them. Plumbing in exterior walls, kitchen sinks on the north side, and laundry rooms above unheated garages all carry elevated risk. Unheated garages with water supply lines round out the priority list.
Reading the Alerts That Matter
A freeze watch means conditions are favorable for a freeze within the next 24 to 48 hours. A freeze warning means a freeze is imminent or occurring, usually within 12 to 24 hours. A hard freeze warning drops temperatures to 28°F or lower for several hours, the point at which exposed pipes and tender vegetation both start failing.
Each tier should trigger a different response: a watch means gather supplies, a warning means drain and insulate, and a hard freeze means keep faucets dripping and check vulnerable spaces through the night.
Staging the Supplies That Make Freeze Prep Fast
The worst time to discover you do not have pipe insulation is at 9 p.m. with the temperature already falling. A pre-assembled freeze kit turns a panic scramble into a 30-minute job.
The Core Freeze Kit
Store these items together in a labeled bin so anyone in the household can find them:
- Faucet covers for outdoor hose bibbs, either foam dome style or insulated bag style
- Foam pipe insulation sleeves (pre-slit, 3/4-inch for most supply lines)
- Heat tape rated for the pipe material (self-regulating is safer than constant-wattage)
- Weatherstripping and caulk for sealing the last-minute drafts
- A flashlight, extra batteries, and a battery-powered NOAA Weather Radio for power-out alerts
- The main water shutoff valve location marked clearly, with a meter key if the valve sits in a meter box
Stocking for an Outage That Outlasts the Freeze
Power often returns within hours, but ice storms can knock it out for days. Keep one gallon of drinking water per person per day on hand; even three days buys real margin during a freeze. Add blankets, a manual can opener, non-perishable food that does not require cooking, and a first-aid kit. If anyone in the home relies on electric medical equipment, plan a backup now, not at midnight.
Detector Maintenance Before Heating Season Ramps Up
Space heaters, fireplaces, and generators all increase carbon monoxide and fire risk, and a dead smoke detector is the same as no detector. Press the test button on every smoke and carbon monoxide alarm before the first hard freeze and replace any battery older than six months. Detectors older than ten years should be replaced entirely.
Freshly checked detectors make indoor winterizing far safer, especially in utility spaces where pipe insulation and combustion appliances sit side by side.
Winterizing Plumbing Inside and Outside the House
Plumbing accounts for the majority of freeze-related insurance claims, and the steps to protect it are mechanical and repeatable. Working from the outside in catches the lines most homeowners forget.
Outdoor Lines: Hoses, Bibbs, and Sprinklers
Disconnect every garden hose and drain it before storing it for winter. Hoses left attached hold water against the hose bibb valve, and that trapped water freezes back into the pipe. Inside the house, locate the shutoff valve that feeds the outdoor faucet (often in a basement, crawl space, or utility room), turn it off, then open the outside faucet to drain the line.
Cover the bibb with an insulated cover even after draining, since the valve body still sits exposed to wind chill.
Sprinkler supply lines need a full blowout if the system runs through winter zones. An air compressor rated for the system volume forces water out of each zone; any water left in the lines can crack a fitting that costs hundreds to replace. Irrigation contractors warn against skipping this step because a single trapped section can split a PVC fitting overnight.
Indoor Lines: Insulation, Cabinets, and the Night-Before Routine
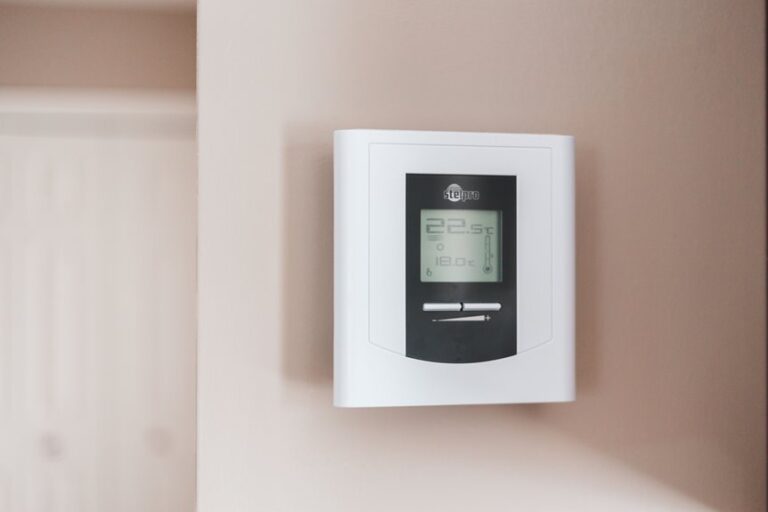
Wrap exposed pipes in unheated spaces with foam sleeves or wrap them with heat tape rated for the pipe material. Pay special attention to runs through the attic, garage, crawl space, and any exterior wall cavity you can access. Before an overnight freeze, open cabinet doors under kitchen and bathroom sinks so warm indoor air reaches the pipes, and set the thermostat no lower than 55°F even if the home will be empty.
The drip-faucet step sounds wasteful but works on physics: moving water releases a small amount of heat and relieves the pressure that builds when ice does form. A trickle from both hot and cold lines on vulnerable faucets is enough; you are not trying to drain the system, just keep pressure from rupturing a joint.
Once both lines hold steady pressure, attention turns to the drafts that quietly undo all that careful plumbing work.
Tip: a quarter-inch stream from a single faucet uses roughly one gallon per hour, so running two or three faucets overnight costs pennies compared with a burst-pipe repair.
Sealing the Building Envelope Against Cold Air
Pipes freeze because cold air reaches them. Stop the air leaks and you often stop the problem before insulation alone could.
Windows, Doors, and the Obvious Drafts
Walk the interior of the house with a hand an inch from window frames, door frames, and electrical outlets on exterior walls on a windy day. Anywhere you feel cold air is a place the furnace is fighting a losing battle and a pipe behind that wall is running colder than it should. Re-caulk window trim, replace compressed weatherstripping around doors, and install foam gaskets behind outlet covers on exterior walls.
Attic Bypasses and the Warm-Air Leak You Cannot See
Recessed lights, bathroom fans, plumbing vent stacks, and gaps around attic access hatches all let warm indoor air escape into the attic, where it melts snow on the roof above and refreezes as an ice dam at the eaves. Seal those bypasses with fire-rated caulk or spray foam, then add insulation to the attic floor until you reach at least R-38 in most climates.
An attic that stays cold does not form ice dams, which protects both the roof and any pipes routed through the space.
Gutters, Downspouts, and Foundation Drainage
Clean gutters and downspouts once leaves stop falling, then run water through them to confirm flow. The point during a freeze is not to prevent ice entirely; it is to keep meltwater moving away from the foundation. Downspouts should discharge at least three feet from the house, and any low spot where water pools against the slab is a place to add soil or extend the discharge line before the ground freezes solid.
Redirecting runoff away from the slab keeps water from settling into the same foundation cracks cold air is already exploiting.
Heating the Home Safely Through the Coldest Hours
Heating equipment causes more home fire deaths than any other household system, and most of those fires happen during winter months. Treating the heating system as something to verify, not just turn on, is the single biggest safety upgrade before a freeze.
The HVAC Service That Pays for Itself
Schedule a furnace tune-up in the fall, or at minimum replace the filter and verify the thermostat holds a steady setpoint. A clogged filter makes the furnace run hotter internally without warming the house faster, which shortens equipment life and stresses heat exchangers. If the furnace makes any new clicking, popping, or smell during the first cold run, shut it off and call a technician. Carbon monoxide from a cracked heat exchanger is odorless and lethal.
Space Heaters, Fireplaces, and Generators
Use only UL-listed space heaters with an automatic tip-over shutoff and a sealed heating element. Keep them three feet from anything combustible, plug them directly into a wall outlet (never an extension cord), and turn them off when you leave the room. Fireplaces need a screen, a clean flue, and the damper fully open before lighting. Generators belong outdoors, at least 20 feet from any window, door, or vent, with the exhaust pointing away from the house.
Spotting a Frozen Pipe Before It Bursts
Early signs include a faucet that produces only a trickle when other faucets flow normally, frost or condensation on exposed pipes, and a faint bulge or wet spot on drywall near a plumbing run. The right move is to shut off the main water valve, open the affected faucet to relieve pressure, and warm the frozen section slowly with a hair dryer or warm towels.
Open flames and electric heaters pressed against pipe insulation are a fire risk; patience and gentle heat thaw the ice without cracking the pipe.
Protecting Plants, Pets, and Property After the Freeze
The thaw brings its own set of problems, and the hours immediately after temperatures climb back above freezing are when most of the avoidable damage shows up.
Plants, Pets, and the Outdoor Checklist
Cover tender shrubs and ornamentals with burlap or frost cloth before sunset on the coldest night, and bring potted plants inside well before temperatures bottom out. Frost cloth breathes; plastic sheeting does not, and a plastic sheet pressed against foliage on a sunny morning can cook the leaves it was meant to protect. Pets that normally live outdoors need a sheltered space with unfrozen water and a heat source safe enough that they cannot burn themselves against it.
The Property Walk-Through the Morning After
Once the thaw starts, walk the exterior and interior looking for ice dams at the roof edge, sagging gutters full of ice, branches cracked under snow weight, and any signs of plumbing leaks inside. Check the water meter with all fixtures off; a spinning meter with no water running anywhere means a leak somewhere in the system, and finding it within hours can be the difference between a dry basement and a finished one.
The First Ten Minutes After a Burst Pipe
Shut off the main water valve immediately, then open every faucet in the house to drain the lines. The faster you stop the flow, the less water ends up in walls, floors, and ceilings. Call a licensed plumber as soon as the valve is closed; many offer 24-hour emergency response during hard freezes. Document the damage with photos before cleanup begins, since insurance adjusters need a clear before-and-after record.
| Action | When to Do It | Why It Matters |
|---|---|---|
| Shut off main water valve | First 60 seconds | Stops ongoing flooding |
| Open all faucets | Within 5 minutes | Relieves pressure in lines |
| Call a licensed plumber | Within 30 minutes | Limits structural damage |
| Document damage with photos | Before cleanup | Supports insurance claim |
| Begin controlled drying | Within 24 hours | Prevents mold growth |
Bottom Line
The cheapest freeze preparation is the kind you do before the temperature drops: disconnect hoses, insulate exposed pipes, seal the worst drafts, and keep the thermostat steady. A few hours of work in the fall can prevent thousands of dollars in damage and the kind of insurance claim that follows you to your next renewal.
FAQ
What should I do to my house before a freeze?
Disconnect outdoor hoses, shut off and drain exterior faucets, insulate exposed pipes, seal drafts around windows and doors, and set the thermostat no lower than 55°F. Confirm smoke and carbon monoxide detectors have fresh batteries before any heating equipment runs.
Should I let my faucets drip during a freeze?
Yes. A quarter-inch stream from vulnerable faucets, both hot and cold lines, keeps water moving and relieves pressure that builds when ice forms. The cost is roughly one gallon per hour per faucet, pennies compared with repairing a burst pipe.
At what temperature will pipes freeze in a house?
Pipes can begin freezing when pipe surfaces reach about 20°F, which can happen even when outdoor air reads 28°F if the pipe runs through an unheated space. Six to eight hours below freezing is the typical window for damage to develop.
How do I protect outdoor faucets from freezing?
Disconnect and drain every hose, shut off the indoor valve feeding the faucet, open the outdoor faucet to drain the line, and cover the bibb with an insulated cover. Even drained lines benefit from a cover since the valve body stays exposed.
How do I keep my house warm if the power goes out in a freeze?
Close off unused rooms to shrink the space you are trying to heat, stuff towels under doors and against drafty windows, and layer clothing and blankets. Never run a generator indoors or use an outdoor grill inside for heat; both produce carbon monoxide that can build to lethal levels before you notice symptoms.
What is the best way to insulate pipes for a freeze?
Pre-slit foam sleeves work for most supply lines in accessible spaces; self-regulating heat tape is the better choice for pipes that stay cold despite insulation. Match the insulation or tape rating to the pipe material, and seal the sleeve joints with tape so cold air cannot reach the pipe surface.